After a backup is performed, data is stored in a created Recovery Point. There are three ways to restore or access your files:
- Restore selected files to their original location. See Restoring Your Control Panel Account.
- Download files to local computer and upload files via FTP to website (Control Panel home).
- Send a TAR or ZIP archive containing selected or all files to the Control Panel home directory. See Sending Your Control Panel Account Backup to Control Panel Home.
This topic describes the second option. Follow the instructions below to download your Control Panel account backup as a ZIP or TAR archive to your local machine.
| Tip These instructions are for Control Panel end-users. |
1. Access the R1Soft CDP Web Interface. Read more in these articles:
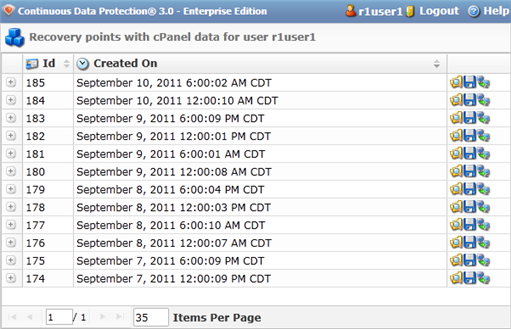
2. You will see a list of Recovery Points storing your Control Panel user data.
| Note You can access only the files you own. You cannot restore files owned by other users or root files. |
3. Locate a Recovery Point from which you want to restore your data.
4. Now, specify which data you want to restore.
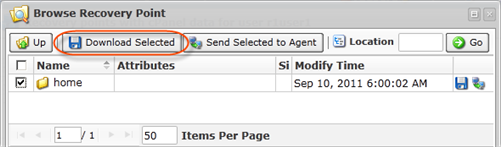
To include all data
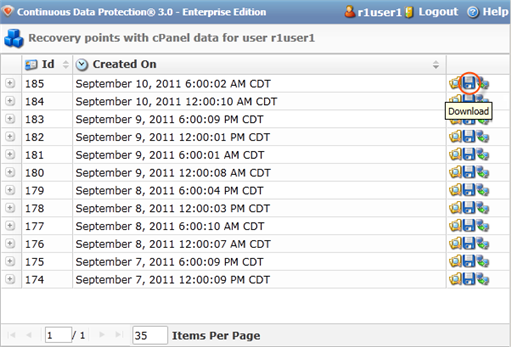
Click on the "Download"  icon to the right of the Recovery Point.
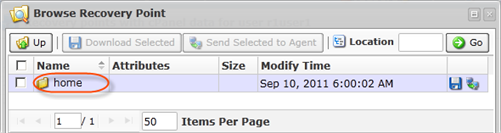
To include the home directory
Click on the "Browse" icon  next to the Recovery Point.
![]()
Select the checkbox in front of the home directory.
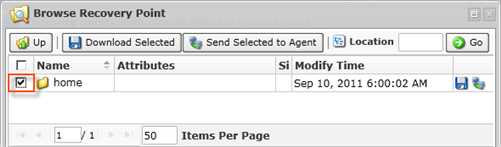
Click on the "Download Selected" button to download the entire home directory as an archive.
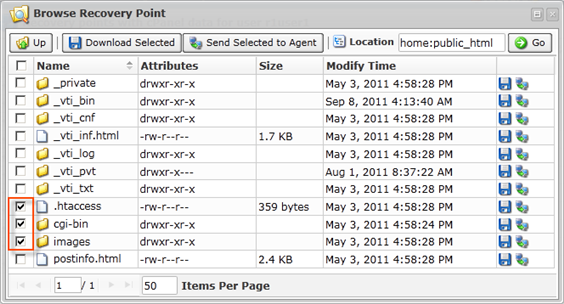
To include selected files and folders
Click on the "Browse" icon to browse through the Recovery Point content and specify the files and folder you want to download.
![]()
In the displayed window, browse the files and folders included in the Recovery Point.
| Tips The built-in file browser functions similarly to Windows Explorer.
|


Select the check-boxes next to the files and folders you want to download.
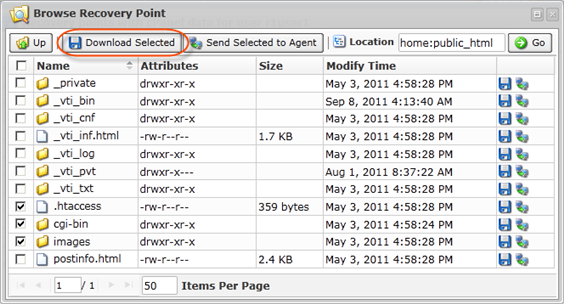
Click on the "Download Selected" button.
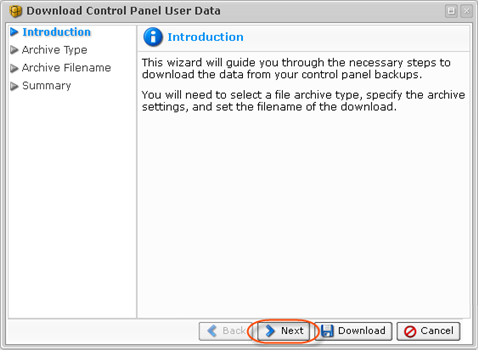
4. The "Download Control Panel User Data" wizard will appear. Familiarize yourself with the introductory information, and click "Next" to proceed with generating the archive for downloading.
5. On the following "Archive Type" screen, select the type of the future file. The following options are available:
- Download files as a tar archive - Allows you to archive and download Control Panel user data as a TAR file. Recommended for Control Panels hosted on Linux servers.
- Compress tar archive with gzip - Allows you to compress TAR archive with gzip compression.
- Download files as a zip archive - Allows you to archive and download Control Panel user data as a ZIP file. Recommended for Control Panels hosted on Windows servers.
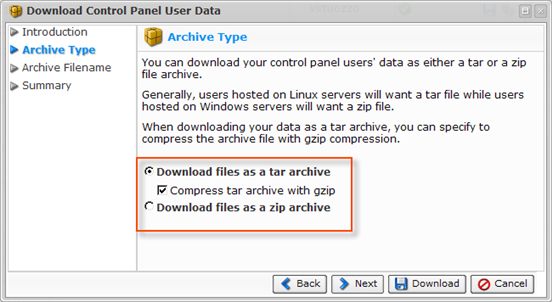
Click "Next."

6. On the next "Archive Filename" screen, you can define the archive filename. The following options are available:
- Use Generated Filename - Allows you to generate an archive filename automatically consisting of the user's username, Control Panel type, and the date on which the Recovery Point was created.
- Specify Filename - Allows you to define a custom archive filename.

Note
You do not need to specify the extension of the file. It will be appended automatically.
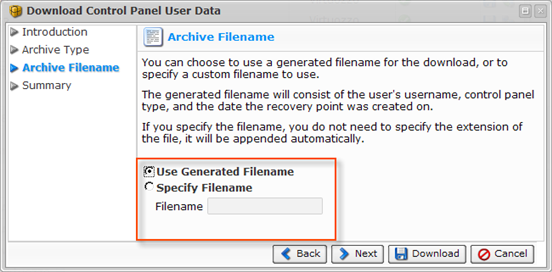
Click "Next."
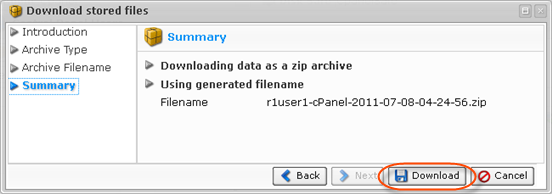
7. On the last "Summary" screen, the settings you have selected will be listed.
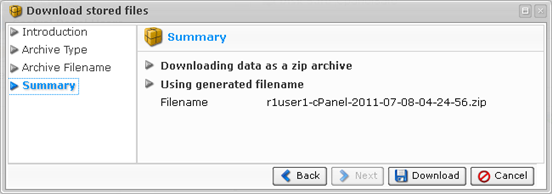
After you have verified that the specified settings are correct, click "Download."
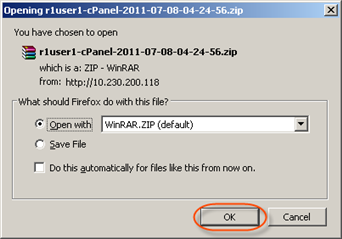
8. The archive will be downloaded to your computer.
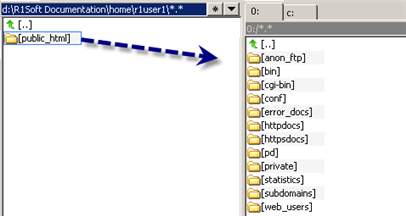
9. Select all files, or browse for specific files within the archive, and extract them to a local Windows computer.
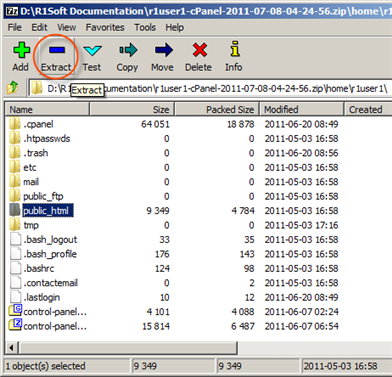
10. Upload the extracted files via FTP to the hosting server.